// Display.cpp
#include "stdafx.h"
#include "Display.h"
bool Display::isRegistered= false;
Display::Display()
{
if (!this->isRegistered)
{
this->RegisterClassEx(
LoadCursor(NULL, IDC_ARROW),
(HBRUSH)(COLOR_BTNFACE+1));
this->isRegistered = true;
}
graphics.Create(BITMAP_WIDTH, BITMAP_HEIGHT);
}
Display::~Display()
{
}
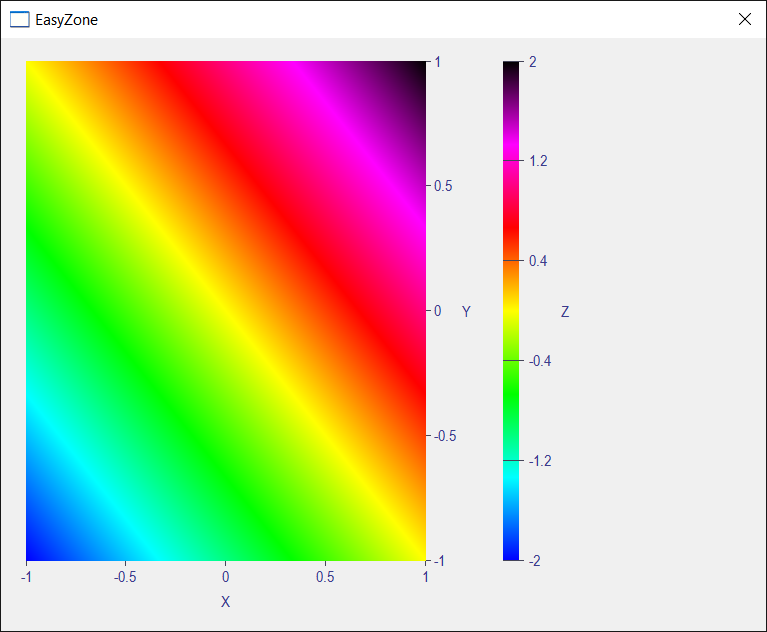
void Display::ComputeBits()
{
//_______________________________ set x limits
const double minX = -1.0;
const double maxX = 1.0;
const double deltaX = (maxX - minX)/(BITMAP_WIDTH-1.0);
//_______________________________ set y limits
const double minY = -1.0;
const double maxY = 1.0;
const double deltaY = (maxY - minY)/(BITMAP_HEIGHT-1.0);
//_______________________________ set z limits
const double minZ = -2.0;
const double maxZ = 2.0;
const double deltaZ = (maxZ - minZ);
//_____________________________________________ Set the Bitmap bits: z = x + y
int row, col;
double x, y, z;
double normalized_z = 0.0;
COLORREF color;
//
for(row = 0; row < BITMAP_HEIGHT; row++)
{
y = maxY - row*deltaY;
for(col = 0; col< BITMAP_WIDTH; col++)
{
x = minX + col*deltaX;
z = x + y;
//_____________________ Normalize z from 0.0 to 1.0
normalized_z = (z-minZ)/deltaZ;
color = Sys::Convert::DoubleToColorRef(normalized_z, false, 6);
GRAPHICS_SETPIXEL(graphics, col, row, color);
//graphics.SetPixel(col, row, color);
}
}
graphics.CreateBitmap();
}
void Display::Window_Open(Win::Event& e)
{
}
void Display::Window_Paint(Win::Event& e)
{
CG::Gdi gdi(e.hWnd, true, false);
gdi.DrawGraphics(graphics, 10, 10);
CG::Font font(L"Arial", 12);
gdi.Select(font);
gdi.SetBkMode(true);
gdi.SetTextColor(RGB(40, 40, 40));
CG::Pen pen(PS_SOLID, 1, RGB(170, 170, 255));
gdi.Select(pen);
//________________________________________ Draw X Axis
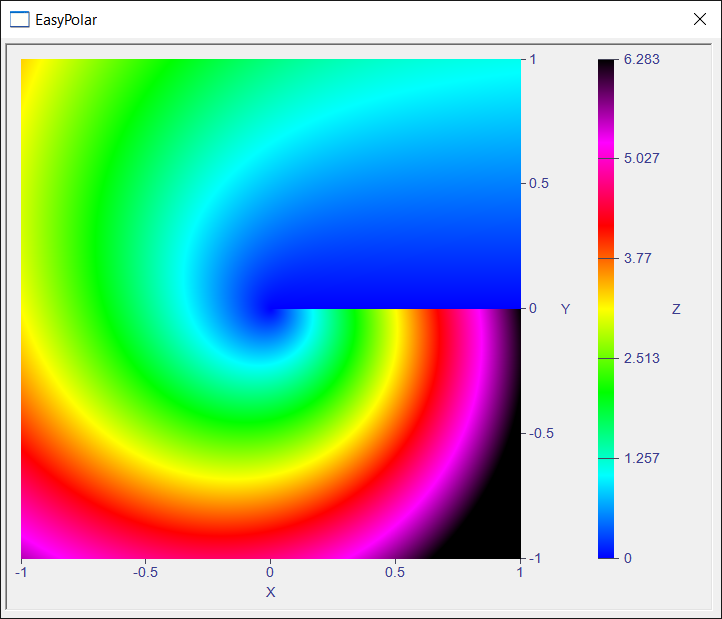
gdi.DrawGraphScaleX(10, BITMAP_HEIGHT+10, BITMAP_WIDTH, -1.0, 1.0, 5, 10, L"x");
//________________________________________ Draw Y Axis
const int scaleWidth = gdi.DrawGraphScaleY(10+BITMAP_WIDTH, 10, BITMAP_HEIGHT, -1.0, 1.0, 5, 10, L"y");
//________________________________________ Color Gradient Scale
gdi.DrawGraphGradientScale(10+BITMAP_WIDTH+scaleWidth+10, 10, BITMAP_HEIGHT/2, -2.0, 2.0, 6, 5, 6, false);
}
void Display::Window_Size(Win::Event& e)
{
}
bool Display::IsEvent(Win::Event& e, int notification)
{
// if (e.uMsg == WM_NOTIFY)
// {
// NMHDR* pNMHDR= (LPNMHDR)e.lParam;
// if (pNMHDR->hwndFrom!=this->GetHWND()) return false;
// if (notification == WIN_ALL_EVENTS)
// {
// // Your code here
// return true;
// }
// if (pNMHDR->code!=notification) return false;
// return true;
// }
//
if (e.uMsg!=WM_COMMAND) return false;
const int id = LOWORD(e.wParam);
const int notificationd = HIWORD(e.wParam);
if (id != this->id) return false;
if (notificationd!=notification) return false;
return true;
}
|
 Show All Controls In Toolbox select the Custom Control tool and draw one Custom Control. Set the name to MyDisplay. In the class tab, set the class to Display.